Monday, August 12, 2013

My 2nd Attempt Making Cake Balls: Lemon Coconut Cake Balls

                 
                                      Who knew a dessert/snack made with 5 simple ingredients could be so sinfully delicious? Meet the cake ball. By now most of you readers have heard of them. A cake ball is basically crumbled cake of your choice (boxed or homemade) mixed with enough ( storebought or homemade) frosting to roll into an appropriately sized ball. Then these babies are dipped in ganache (chocolate chips+ warm heavy cream). Finally you can decorate these with the toppings of your choice. The combinations are endless. These weren't a planned recipe, but I meant to buy buttercream frosting , instead I accidentally bought lemon frosting in a can. Silly me. I did not want it to go to waste, so I decided to try my hand at cake balls. I made these previously at my job, but they did not come out looking as nice as these. My family loves lemon coconut cake, so these would be perfect and easier to make than a giant layer cake. Right? Cake balls are a great to make during a lazy afternoon where you have not alot to do and you are in the creative cooking mood. 
WARNING: THESE DO GET MESSY. DO YOURSELF A FAVOR AND WEAR SOME GLOVES.
^ see what i mean. this is messy business!
Ingredients
1 package cake mix of your choice- I chose golden cake
1 can lemon frosting
1/2 bag sweetened coconut
1 bag white chocolate chips
-enough hot heavy cream to make velvety ganache-
colored sugar (optional)

OK LETS GET READY TO CAKE BALL.
STEPS: HAVE EVERYTHING OUT TO MAKE YOUR PACKAGED CAKE MIX, CHOCOLATE OF YOUR CHOICE, TOPPINGS, A PARCHMENT PAPER LINED BAKING PAN, CAKE PAN (SPRAYED), FROSTING!! MICE EN PLACE.
                                 1. Prepare cake according to package directions. 
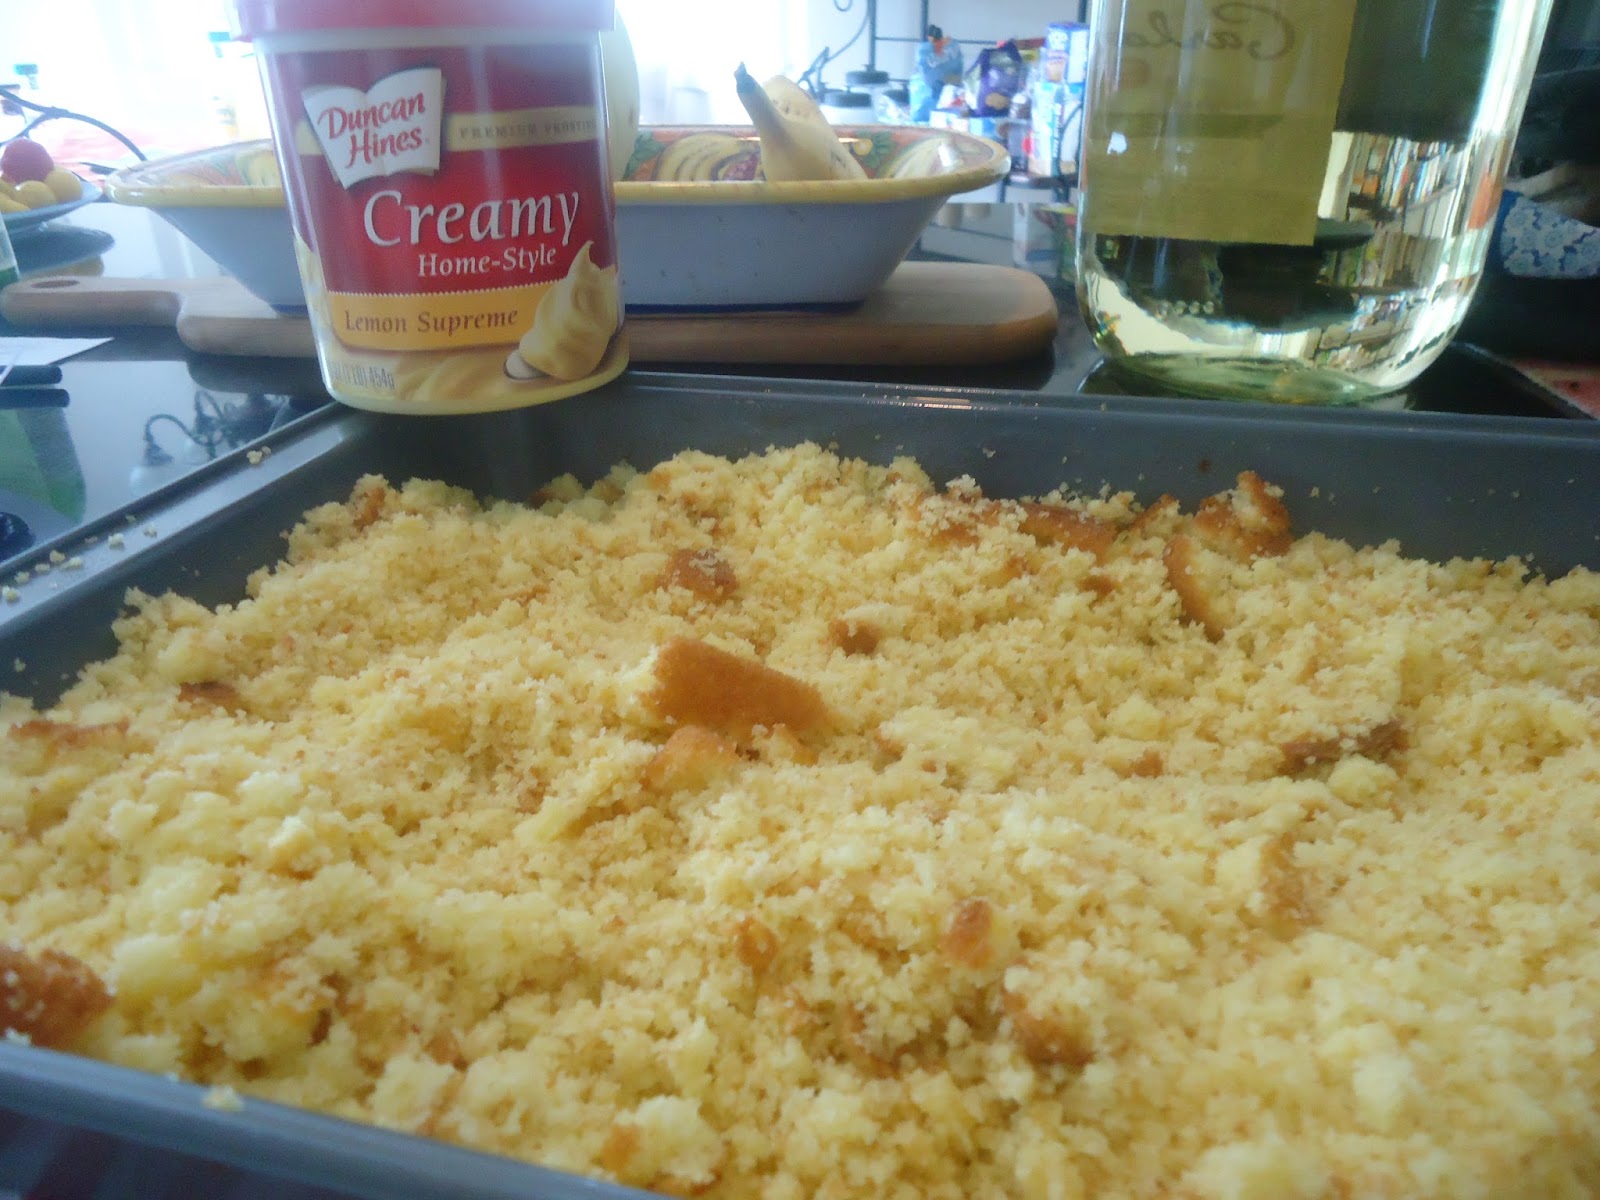
                                 
2. Let cake cool and crumble into nice crumbs.
 
^ Like this. EASY. Now it's frosting time.
3. Add frosting by spoonfuls into cake crumbs. You will end up using almost all the frosting.
4. Combine the cake and frosting with your hands until it becomes a uniform mix.
5. Shape into small-medium size balls.
6. Refrigerate on parchment paper lined tray. 
7. Prepare ganache by heating heavy cream in a small saucepan.
8. Pour choc chips in a medium bowl. 
9. Slowly pour hot cream over choc chips.
Mix until velvety smooth. 
* If the chips do not melt all the way, put the cream and chocolate mix
in the microwave at 5 sec intervals. :)
^ very nice ganache, eh?
10. Take cake balls out of fridge. 
11. Using your hands and 2 spoons , place a cake ball in the ganache. 
12. Using a spoon move it around the ganache. Use your second spoon to pour some ganache over the balls. You want to coat the cake evenly and to have a smooth , round coating of ganache.
13. Do this method until all the cake balls are coated.
14. Place on a parchment paper lined tray.
15. Decorate with coconut or colored sugars.
16. Place back in the fridge until coating is a bit hardened.
17. Devour one by one. ;)

Every cake ball is unique. LOL.
Serves: About 24 cake balls
I loved making this recipe because it kept me occupied and on a sugar high. Also, the combinations
are limitless,be creative.


Wednesday, August 7, 2013

I have the urge to cook and blog! Cheesy corn dip


Adapted from: Food.Com (Trisha Yearwood's Recipe)

I have a thing for corn.. no basically vegetables in general. I was never the kid who didn't eat her vegetables. Last year I attended a graduation party and the host served this wonderful corn dip! It was creamy, sweet, and salty at the same time. I was stupid not to ask for the recipe, but time went on and I forgot about it. At my house we had a lot of chips around and I luckily remembered I always wanted to make this savory dip. My family loved it and I hope you do to. I halved the recipe , and it was plenty for 3 people for 2 nights! Plus its EASY to make with just a few ingredients.
Go ahead dip it in chips, or eat it with a spoon.
* blue indicates changes I made to the recipe

Ingredients:
 ( 1)2 cans of mexican corn ( I used regular sweet corn, it was fine)
(1) 2 Cans chopped green chilies
1 Cup Shredded Monterey Jack Cheese (Mexican Cheese Blend)
(1/3) 3/4 Cup Grated Parmesan Cheese
(1/2) 1 Cup Mayo
CHIPS!!
^ JUST SO SIMPLE AND DELICOUS!


^ Ready for the oven!

Have all your ingredients out and measured.. Simple Mice En Place
Steps:
1. Preheat oven to 350. Grease a small casserole dish.
2.In a medium bowl, mix the corn, chiles, cheeses, and mayonnaise until fully combined. Spread the mixture in the prepared casserole dish and bake, uncovered, for 30 to 40 minutes, or until bubbly around the edges. Serve the dip warm from the oven with corn chips.
Serves 3 .. FOR 2 DAYS!


Friday, July 19, 2013

The Heat Wave Won't Stop Me: Cookie Butter Granola Bars


Adapted from: FruetCake
You may or may not know that the Northeast is experiencing a crazy heat wave this week.It feels like my kitchen has reached 80 degrees inside. My mom doesn't like me baking or cooking too much when these heat waves happen because the kitchen gets pretty hot one you open up the oven. Regardless, I was dying to make a healthy breakfast/snack for the week because I've been eating Special K for days. I had  Trader Joes cookie butter on hand and found this great bar recipe to use it up. I'm so glad this recipe used cookie butter instead of peanut butter because I hate peanut butter. I modified this recipe by adding dark chocolate chips. I LOVE DARK CHOCOLATE ( ok sorry for the ADD moment). This hot weather is not going to stop me from creating good eats. :)

You will need:
2 cups old fashioned oats ( Quaker)
1/3 cup chocolate chips
1/2 cup cookie butter
1 egg
1/4 cup honey
vegetable cooking spray or butter
1/3 cup brown sugar

MICE EN PLACE: have all your ingredients out and oven preheated
1. Preheat oven to 350.
2.Position oven rack in the middle of the oven.
3. Line a 7 by 10 3/4 baking pan with parchment paper and spray. Set aside.
4. In a medium bowl,using a hand beater or large spoon, beat egg white until frothy.
5.Stir the cookie butter,brown sugar, and honey.Add the melted butter and oats.
6. Stir to combine, add in chocolate chips.
7. Using a rubber spatula, spread mixture on a prepared pan. 
8. Bake until the mixture begins to brown, about 15 minutes.
9. Cool for 1 hour.
Bon Appetit!
Serving Size: about 10 bars


Friday, June 21, 2013

Super Duper Easy Apple "Tart"

                                           
Adapted from: The Pioneer Woman
I made this dessert the same day I made the Chicken BLT salad. My boyfriend came to for the day, and I wanted to make lunch for him because I'm pretty sure he missed my cooking. ( lol) Me being me, I couldn't complete the meal without a dessert. I wanted to make something simple that tasted great. During my blog search I came upon this wonderful and simple tart recipe. This is awesome because you only need a few ingredients! Unfortunately, I thawed my pastry a little too much so my portions were not as big as I wanted. If you do this 100% accurate you will get 3 nice sized "tarts". This dessert is quite inexpensive too.
 Ingredients:
1 sheet puff pastry, store bought is fine. (it tastes great to me)
3-4 baking apples, sliced thin,skin on
 1 cup light brown sugar - to sprinkle on tarts
 * vanilla frosting to drizzle on top, optional
Steps: Have apples sliced and puff pastry thawed. MICE EN PLACE
1.  Preheat oven to 415 degrees.
2. Separate puff pastry into 3 equal rectangles.
3. Mix apple slices with enough brown sugar to coat them nicely. 
4. Squirt lemon juice on apples, so they don't turn brown.
5. Arrange apple slices in a straight line on each puff pastry rectangle.
6. Bake for 18-20 minutes. Watch the pastry so it does not burn.
7. Let cool, and drizzle with vanilla frosting.
Serving size: 3 tarts


Long Time NO Blog! :( : CHICKEN BLT SALAD

                  Hello all! Wow it seems like its been a long time since I've actually blogged about a new recipe. Like I've said, I have a job now, so sometimes its hard to get up and cook again. NO FEAR, here is a new recipe. I originally wanted to make a pasta salad or hot pasta dish, but either one would not be best because it would be boring or too hot to eat in this weather. A light bulb went off in my head and I found an idea. BLT SALAD!! I was sure my boyfriend and parents would enjoy this. I was right too. My man asked for seconds and my parents enjoyed it.YAY! Plus, I had left over pasta and breaded chicken cutlets to add in. Also, I spent less money on this because I had those ingredients in my house. All I needed was mayo, bacon, tomatoes , and lettuce. I suggest adding a splash of lemon or lime on top to give this salad an extra yummy kick. :) This is my own recipe, so if you wish to copy it on your blog, please give me creds.
                                                                You will need:
                                              1 bag of lettuce ( I chose American romaine)
                                              1/2- 3/4 cup light mayonnaise
                                              1 medium chicken cutlet, cut into cubes
                                              Enough pasta to fill the bowl you are using
                                              1-2 squirts, fresh lime/lemon juice
                                              5 slices cooked bacon
                                              3-4 Roma tomatoes, chopped
                                      Steps: Have lettuce washed, tomatoes and chix cut, bacon cooked, AND A  BIG BOWL READY! MICE EN PLACE!
                                        1. Combine lettuce, chicken, chopped bacon, mayo, pasta , and tomatoes in a bowl.
                                        2. Stir until thoroughly combined.
                                     
                                        3. Squirt a bit of fresh lemon or lime juice on top.
                                       
                                        4. DEVOUR!
                               
                                         Serving Size:  2-3 large servings


Monday, June 10, 2013

Product Review #1: Healthy Choice Steamers- Portabella Marsala Pasta

       
                Hello everyone, long time no blog, I know! Don't worry I still love cooking and posting my new culinary adventures with you. Recently, I have gotten a internship at a local italian deli/restaurant and have been working two days a week 9-3. I love my new job there, I am learning alot and improving my skills. That, plus having to deal with the death of my grandmother have taken up a few weeks. Another thing, there was an incident with my car, so I was not able to drive it to the supermarket to get what I need to cook for y'all. Anyway, I finally got to the store yesterday with my mother and picked this up for a quick lunch the next day. These new meals just caught my eye.
    I used to be a HUGE fan of frozen entree's when I was a child, I would have a package at least once a week if I remember correctly. I mean they were so much fun to choose at the store and eat. I have had the kiddie meals, Stouffer's, Lean Cuisine, Healthy Choice, and Smart One's entrees. All of them have a unique aspect to their food. For example Kids Cuisine is marketed towards children because they have kid approved food and bright colors to go with the packaging. Lean Cuisine, on the other hand is marketed towards women because the array of entree's usually have no more than 300 calories a box.
                                                                     - Review-
 First impressions:  I have had Healthy Choice entree's before, but this is a whole new deal.. MICROWAVE STEAMERS! Sounds healthy, right. And they are healthy.
Calories: 250
Fat: 6
Lets face it we need this amount of calories to have a decent lunch. Let me tell you, I was full after eating this with some skinless turkey and a 0 cal drink. The package is heavier than most frozen entree's. That is a good thing because you're getting more food for less calories, salt , and fat.  It takes 5 minutes in the microwave. Upon taking it out, I smelled a WONDERFUL mushroom aroma coming from downstairs where the microwave is.

 Appearance * The box and the actual presentation match pretty well.Both seem tasty looking!!


Appearance is important when you're dealing with frozen entrees. Some frozen entree packaging are known to be misleading in cooked appearance. In the end, we end up eating that frozen egg patty slathered in microwave bacon , right? Our stomachs control our minds sometimes. In this entree, I was surprised by the amount of food I got. Kudos, Healthy Choice, kudos.

Taste: For a microwave pasta meal, the pasta was tender and delicious. Frozen entree companies have improved on their pasta formula over the years, thats for sure. The amount of mushrooms was just right for me, I'm a mushroom lover! The portabella mushroom sauce was a bit bland for me, it actually needed salt. There could have been more fontina cheese on top, it was delicious, and would have taken care of the salt issue, but we are trying to be healthy.

Overall: I would buy this entree, and various Healthy Choice Steamers again.
                                                 Rating    3 1/2 stars

    Rating System: 1 star = never eating this again
                             2 stars= I wasted my money on this meal, but I will eat it because I'm hungry.
                             3 stars= I am satisfied
                             4 stars= Omg this is so good!
                             5 stars= foodgasm. get me more.
                             

Tuesday, May 21, 2013

My Brother is Home from College!: Red Curry Noodle Soup

 Adapted Slightly from: Jeanette's Healthy Living
        On Saturday, my family and I made the 2 hour journey to pick up my twin
brother from college. ( finally) Sometimes I feel sorry for him because he does not have a very good eating experience at Swarthmore's dining hall. Even some of the simplest things like pizza supposedly taste horrible. Being able to mess up a pizza is beyond me. When we got home my mother had everything decided for dinner for the week. The first night we had bbq chicken and pasta with her famous pesto sauce. It was so delicious, I wish you guys were there to try. Tonight she is reheating the meat sauce she made a few nights ago, which is also to die for. Earlier, he complained that I never cooked anything for him all the times he was home. Well, today was going to be the day.
I really wanted to make brownies using the recipe my college has because they are so decadent and yummy. Unfortunately , we have wayyy to much dessert in the house for another addition. My brother and I both enjoy thai food, so I decided to make this great soup because it was easy to make and it served 2 perfectly. Note, I used "light" coconut milk in this soup, it gives an "ok" coconut flavor and richness, if you want more then opt for the regular 140 -calorie stuff. :) All in all, my brother, who is usually a bit picky, really enjoyed this soup with tofu and noodles. It makes a quick and delicious lunch or dinner. My substitutions are in bold.

You will need:
1 teaspoon flavorless oil
1 tablespoon plus 1 teaspoon red curry paste
1 cup classic coconut milk
1 cup chicken stock
1 stalk of lemongrass , trimmed,peeled, tender part smashed
1 piece ginger, about the size of a quarter , smashed ( I did not use this)
2 cups spinach, rinsed and stems removed, torn 
8 oz tofu shirataki noodles, angel hair shape ( rinsed and drained)
1 cup soft silken tofu
a dash of soy sauce


Steps: Have spinach torn, tofu cubed, and "noodles"rinsed/drained before prep. MICE EN PLACE!
1. Heat a medium saucepan. Once it is hot, add the oil and curry paste. Stir until fragrant, about 2 minutes.
2. Add coconut milk, stock, and lemongrass. Bring to a boil, then add spinach. Cook for one minute.
3. Then, add shirataki noodles and tofu. Cook until warmed about 3 minutes. Add a splash of soy sauce at the end.
                                                                          ENJOY!!
                                                         Serving Size: 2 generous helpings