Tuesday, May 21, 2013

My Brother is Home from College!: Red Curry Noodle Soup

 Adapted Slightly from: Jeanette's Healthy Living
        On Saturday, my family and I made the 2 hour journey to pick up my twin
brother from college. ( finally) Sometimes I feel sorry for him because he does not have a very good eating experience at Swarthmore's dining hall. Even some of the simplest things like pizza supposedly taste horrible. Being able to mess up a pizza is beyond me. When we got home my mother had everything decided for dinner for the week. The first night we had bbq chicken and pasta with her famous pesto sauce. It was so delicious, I wish you guys were there to try. Tonight she is reheating the meat sauce she made a few nights ago, which is also to die for. Earlier, he complained that I never cooked anything for him all the times he was home. Well, today was going to be the day.
I really wanted to make brownies using the recipe my college has because they are so decadent and yummy. Unfortunately , we have wayyy to much dessert in the house for another addition. My brother and I both enjoy thai food, so I decided to make this great soup because it was easy to make and it served 2 perfectly. Note, I used "light" coconut milk in this soup, it gives an "ok" coconut flavor and richness, if you want more then opt for the regular 140 -calorie stuff. :) All in all, my brother, who is usually a bit picky, really enjoyed this soup with tofu and noodles. It makes a quick and delicious lunch or dinner. My substitutions are in bold.

You will need:
1 teaspoon flavorless oil
1 tablespoon plus 1 teaspoon red curry paste
1 cup classic coconut milk
1 cup chicken stock
1 stalk of lemongrass , trimmed,peeled, tender part smashed
1 piece ginger, about the size of a quarter , smashed ( I did not use this)
2 cups spinach, rinsed and stems removed, torn 
8 oz tofu shirataki noodles, angel hair shape ( rinsed and drained)
1 cup soft silken tofu
a dash of soy sauce


Steps: Have spinach torn, tofu cubed, and "noodles"rinsed/drained before prep. MICE EN PLACE!
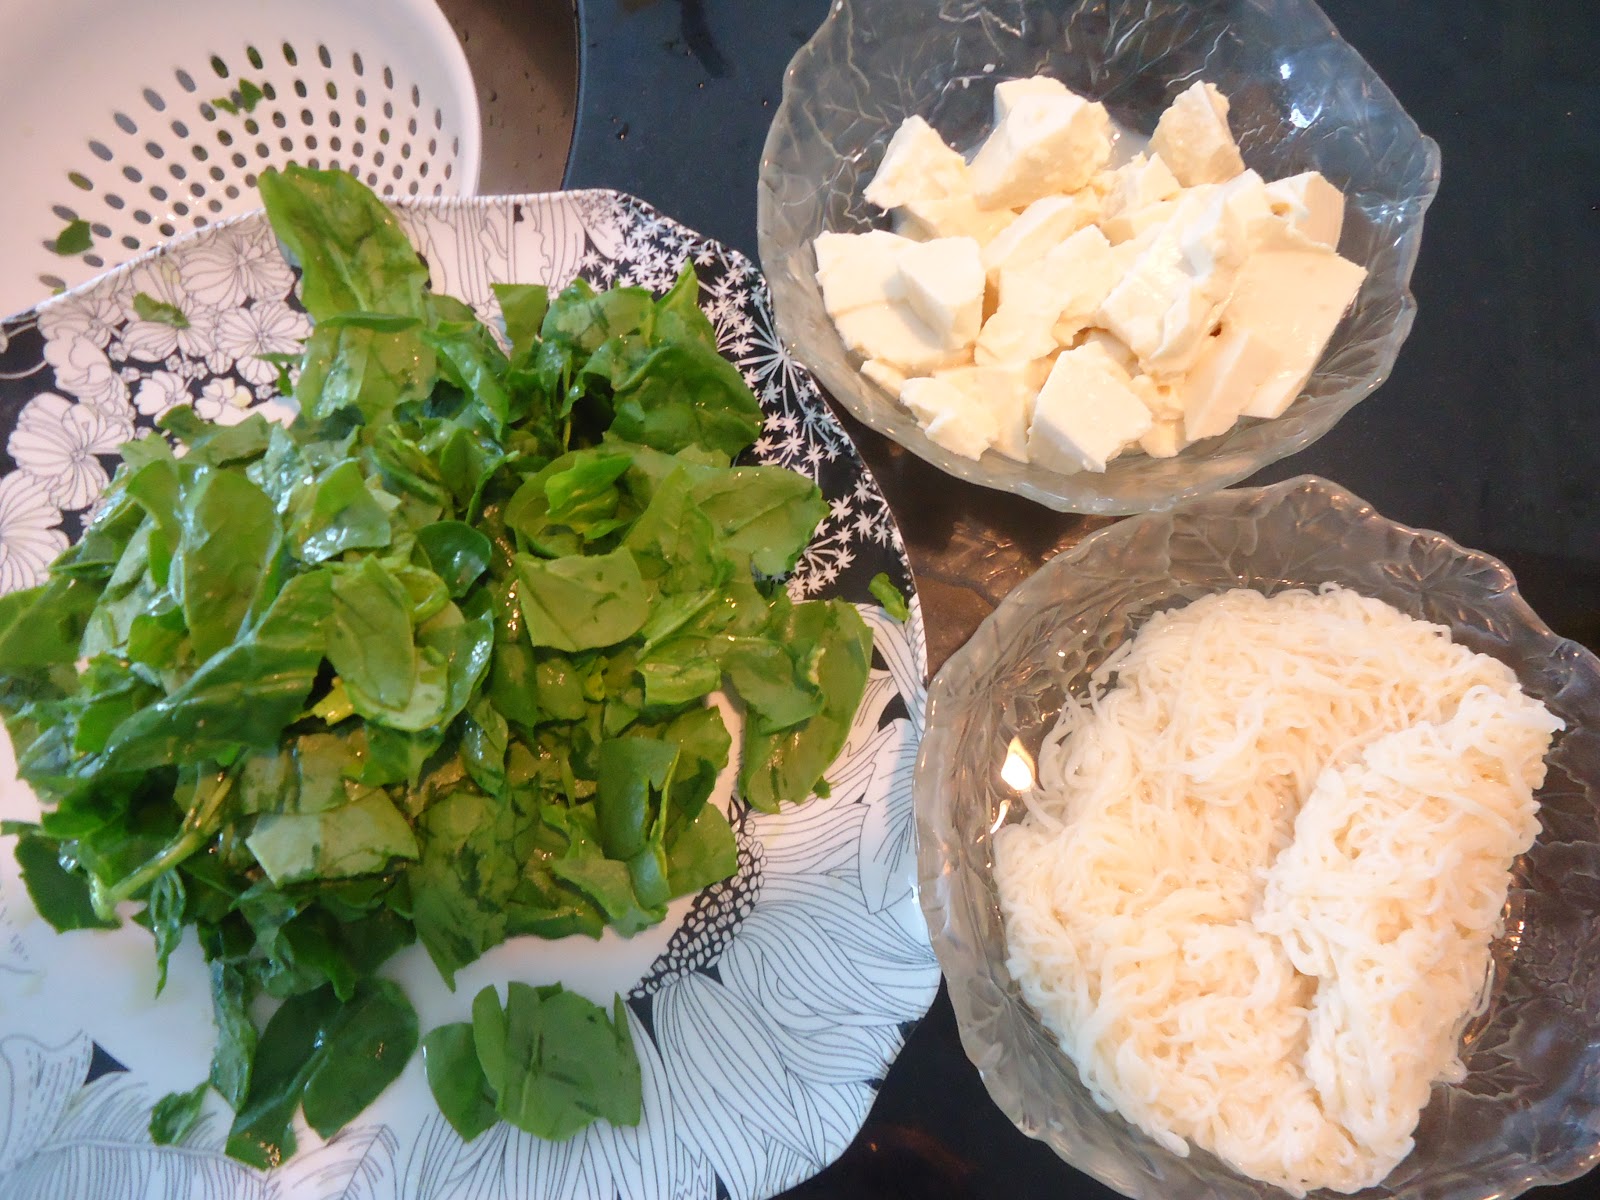
1. Heat a medium saucepan. Once it is hot, add the oil and curry paste. Stir until fragrant, about 2 minutes.
2. Add coconut milk, stock, and lemongrass. Bring to a boil, then add spinach. Cook for one minute.
3. Then, add shirataki noodles and tofu. Cook until warmed about 3 minutes. Add a splash of soy sauce at the end.
                                                                          ENJOY!!
                                                         Serving Size: 2 generous helpings


Saturday, May 18, 2013

Pretty in Pink Trifle * MOTHER'S DAY*

           
Do you ever catch yourself scrambling to get that "second gift" for a holiday?
Well, I was. See, my mom wanted pictures of my brother and I from this year. I really procrastinated ordering those, but luckily CVS has a service where the photos are ready the same day. GENIUS RIGHT? Anyway I ordered those on the friday before Mother's Day. All the photos were under $10. Although it was good for my bank account I really wanted to do more , because my mom is worth more than $5 worth of photos. When she and my dad were visiting my grandmother in the hospital I whipped up my own version of a strawberry trifle. I call it a "pretty in pink" trifle because the cake and the strawberries give it a beautiful color and taste. Please note my recipe suggestions.
You will need:
1, 16oz box strawberry cake mix
About 1 1/2 cups fresh strawberries
2 boxes of instant vanilla pudding
(* 3 cups of milk for dry pudding instead of 4! You want the custard to be thick!)
1 package of Cool Whip ( or similar) - as needed
Almonds * as a garnish*
Steps: Have a trifle bowl ready and your strawberries cut. MICE EN PLACE!

1. Prepare the strawberry cake according to package. Mix it up well, so it looks all pretty and pink. :)
beautiful!
2. Cool the cake and cut half of the prepared cake into 1/2 in cubes. Reserve the other half for later.
3. Prepare both of the instant pudding mixes using 3 cups of cold milk, not 4 cups because you want the pudding a bit thick.


4. Whisk vigorously until thickened. Let the pudding rest for a few minutes without stirring it.
5. In your trifle bowl, layer in order: cake cubes, pudding, and strawberries until you reach the top. Add an extra layer of pudding for the end. Leave about 1 in. of space in the bowl for garnishes and cool whip.
^ Decorate it like this.
6. Using a piping bag with whatever small tip you want, pipe out small puffs of whipped topping all around the bowl.Top the whip cream puffs with slivered almonds. 
7. Using the left over strawberry cake, crumble it up and add into the center of the trifle as shown in the pic.
8. Put left over strawberries around the bowl.
DEVOUR QUICKLY BECAUSE THIS DOES NOT HOLD WELL.
Serving Size: About 4-6 guests
* This is my own recipe: if you wish to copy it please note on your post: Adapted from:...
thanks :)

Friday, May 3, 2013

40 Second Nutella Mug Cake

 
adapted from:BackToHerRoots

For years I have been trying to create the perfect single serve mug dessert. After all the recipes I have tried none seemed to work out. The cakes were either dry and or spongey beyond belief. I eventually gave up and resorted to box mug cake mixes. The box mug cake mixes are very delicious, but I don't have endless dollars to spend either. It's all about trial and error with these recipes. I decided to try the mug cake from this blog because it was easy to make.. and it has NUTELLA. Who doesn't like Nutella?! If you don't like Nutella we can't be friends. I kid you. I ended up microwaving this for 40 seconds not 90 seconds like the blog said because I have a very powerful microwave.


                                                                     You will need:
                                                                      1 egg, beaten
                                                                      1 tablespoon of Nutella
                                                                      1 heaping tablespoon of flour
                                                                      1 teaspoon of baking powder
                                                                      1 tablespoon of brown sugar
                                                                      * powdered sugar for dusting*
                        Steps: Have all your dry ingredients out and your egg beaten. MICE EN PLACE!
                     
              1. Whisk together all wet and dry ingredients, place in a large mug. * This recipe is moist  enough that you won't have to grease it. It worked out for me without any butter/spray!
                              2. Microwave at 70% power for 30 seconds. Then, check the cake and microwave on 100% power for 10 seconds.
                              3. Make sure the cake is moist , but not undercooked on the top and bottom.
                              4. Invert on a plate and dust with some pretty powdered sugar. MMM good!


Serving Size: 1 delicious little cake
Simply amazing! My timing on this little cake was perfect  and I love the molten sauce that appears
when its inverted on the plate. OK NOW I HAVE TO WASH SOME DISHES AND GO ON THE TREADMILL. LOL.

Grilled Chicken Caprese Sandwiches

 
It was one of those days when I ended up eating lunch around 3:20 pm. Not much of a lunch,eh?
Usually I never eat a meal this late, but on Wednesday my boyfriend was coming by and I wanted to make him something because he's always hungry after work and the ride here. I was starving in the early afternoon, but I was able to calm my cravings by having a non fat caramel macchiato from Starbucks. I was torn between making my successful tofu sandwiches with chutney or my all time favorite caprese style sandwiches. WAIT, what is caprese style? Caprese style refers to the combination of mozzarella, tomatoes, and basil. I decided to go with the caprese panini with chicken because it would be more filling for our hungry bellies. I love grilled mozzarella and tomatoes because the cheese is all gooooey and warm, and well the tomato just adds a great flavor. Plus I'm Italian , so I like tomatoes by default. :) These 'grilled cheese' sandwiches are a quick and delicious alternative to your everyday sandwich. I loved it and my boyfriend enjoyed it as well.. He eats anything I put in front of him anyway!

You will need:
4 slices of panini style bread ( I used saloio bread)
4 small slices of vine tomato
4 medium slices of fresh mozzarella cheese
4 leaves of sweet basil
1 whole grilled, prepared chicken breast
a few tabs of butter for the pan and bread

Steps!! Have your ingredients out and a hot pan ready to grill these sandwiches up, because they will cook quickly! MICE EN PLACE!

1. If your bread is not sliced, now would be a good time to slice your chosen bread in 4 slices.
2. Slice the large precooked chicken breast in half, place 1 half on each sandwich.
2. Layer the bottom slice of the bread with the mozzarella slices, basil, tomato, and grilled chicken.
3. Add a few tabs of butter to the hot pan. Allow the butter to get nice and hot, so the sandwiches have that perfect color and crispness.
4. Place both of the sandwiches on the pan. You may want to flatten them a bit by adding another heat proof brick or pan on top. Trust me it makes a difference.
5. Grill on both sides until the sandwich becomes a crispy golden brown and the cheese is melted.
6. Take them out of the pan and devour!
     Serving Size: 2 sandwiches

Wednesday, April 24, 2013

My First Post: Creamy Lemon Pasta

                                                   
                                                     adapted from:OnePotChefShow ( Youtube)


Ok, so on my days off from college (Wednesday and Thursday), I am usually surfing the web, doing homework (usually an SA :P), or hanging out with my boyfriend. And oh yes, catching up on some good exercise so I don't become part of the freshman 15, or freshman 20-30 in culinary school. Today is a bit different. I decided to spend my time in the morning on YouTube catching up on those "Watch Later" Videos. From watching those "Watch Later" videos that were instructional recipes, I came across the channel OnePotChefShow. I was a bit turned off by the man in the video because he did not look like a chef but I was determined to watch how he made this dish. The title "Creamy Lemon Pasta" immediately caught my eye. Also the way he said "pasta" also made me LOL because he has some sort of English accent (nothing wrong with that). After watching this I realized I had all the ingredients to make this dish and headed straight to the kitchen!
I did not end up following his recipe exactly, I adjusted it to my taste. Hopefully you will like my version. It is a perfect main meal or side dish.
You will need:
1,16 oz package of linguine, spaghetti, or fettucine 
The zest of 1 1/2 small lemons
1-2 tablespoons of lemon juice (according to taste)
3 egg yolks
A few splashes of heavy cream ( depends how rich you want it)
3/4 cup of grated parmesan cheese
2 tablespoons salted butter
^ Easy, right?!

Steps!!- Before anything have butter,lemon,ext measure already. MICE EN PLACE!
1. Boil a water in a standard pasta pot. (Enough to fit 1lb of pasta)
2. Add pasta, and cook for about 14 mins. You want it tender,but not too soft
3. If you have not prepared the rest of the ingredients such as the eggs and butter, do that now so they are room temp.
4. When pasta is ready, drain it in a large colander and add some cold water to take off the excess starch.
5. Put the cooked pasta back in the pot you cooked it in.
6. Add the butter, lemon zest,lemon juice,egg, parmesan cheese, and heavy cream. (In any order)
7. Mix  vigorously with a large plastic spoon (slotted is ok). Make sure you incorporate everything well so the eggs don't cook!
8. Add salt and pepper to taste.
9. You can serve this with grilled chicken, shrimp, or veggies. Grilled chicken would go well with this  because the flavor of the grilled chicken would pair nicely with the creaminess of this dish.
Enjoy! :)
 Serving Size: 1 delicious pound of pasta